BY ROGER AND ELAINE BYERS
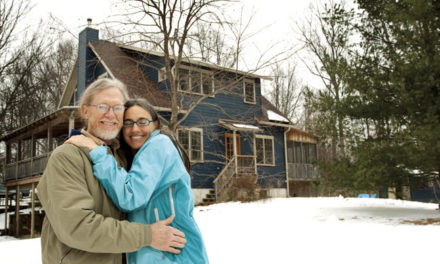
When it came time to start winding down our involvement with the outside working world, one of the first things we agreed on as a worthwhile endeavor was learning to grow our own food. We both have a lot of interests, and were certainly not ready to commit the kind of time it would take to become full-time self-sustaining homesteaders. However, given the periodic problems reported in the news with the commercial food supply, Elaine’s long history of reading such things as Countryside magazine and Mother Earth News, as well as our shared admiration for such forceful advocates of independent living as Scott and Helen Nearing, we decided that it would be very worthwhile for us to invest in vegetable gardening. We wanted to garden on a large enough scale that we would really learn what was involved in growing and preserving our own food, and acquire enough confidence to feel that we could actually sustain ourselves if we had to.
As a first step, we enrolled in the Master Gardener Program through the Purdue Extension, and got ourselves certified as Indiana Master Gardeners. That proved to also be an excellent way to meet experienced vegetable gardeners like Master Gardener Esther Minnick – who in turn got us involved in such activities as working the Monroe County Fair, where one meets other vegetable gardeners… and so it goes.
As a result of the knowledge we acquired through these various sources, and a consideration of our own preferences, we decided to work on a container gardening format that would allow us to build up the soil ourselves, and make planting and harvesting easier by reducing the amount of bending necessary when working at ground level.
Our house in Bloomington stands on a pie-shaped, three-quarter acre lot, which had plenty of area in the back with sufficient sun for growing vegetables. We enclosed the back yard with a six-foot solid privacy fence, believing that deer usually will not jump a fence that they can’t see over – which happily has proved to be true. We have so far never seen deer in the back yard. We decided on four large raised beds for our principal growing area – 4 feet by 8 feet, and 12 inches deep – made from native white oak obtained from Mickey Kinzer’s Saw Mill near Lake Monroe. One of our happiest memories of building the garden will long remain the experience of ordering the lumber on the phone from Mickey, going out to his mill later in the week, and watching the oak trees come in the back, run through the mill, and our boards come out the front. Knowing what they were for, Mickey cut them to full rough size for us, so the boards are actually a full 12 inches deep and 2 inches thick.
Since there is a large stand of mature pine trees on the lot behind ours, as planting time approached we began plotting the changing sun and shade patterns in the area we had selected for the garden. We also identified the areas that would have a minimum of 8 hours of sun for most of the growing season. By late March we were ready to position the raised beds.
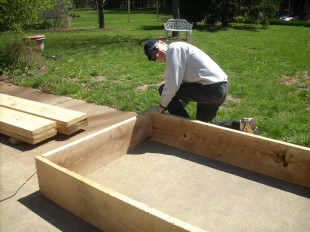
We first partially assembled the raised beds on the patio—which worked out very well. The sides are bolted together with 3/8-diameter lag bolts, 5 inches long. We first drilled 3 clearance holes an inch from the ends of the 8-foot side pieces. (See Picture: Bed Assembly.)
We then stood the boards together and transferred the bolt holes through to the 4-foot end pieces and drilled smaller pilot holes in the end pieces to start the bolts in. Next, we took the boards out to the garden and finished the assembly in place. (Given that each 8-foot side board weighs about 75 pounds. we didn’t want to have to move a completely assembled bed weighing 225 pounds.) We filled the beds with a mixture of compost, composted manure, and Fafard 3B Growing Mix, which May’s Greenhouse uses and recommends to gardeners. It keeps the soil light and porous enough to drain properly, which eliminates root rot and other plant health problems caused by standing water. We also tilled in a standard dose of 12-12-12 fertilizer.
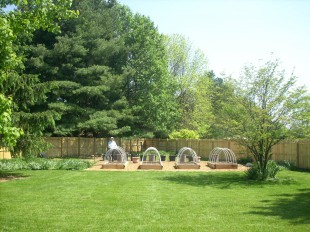
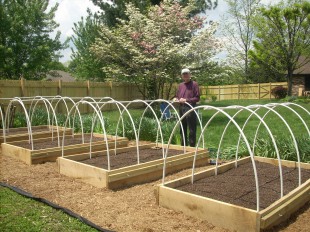
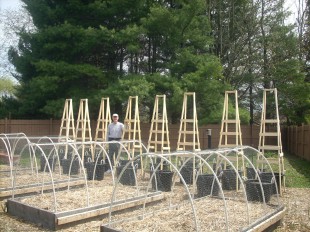
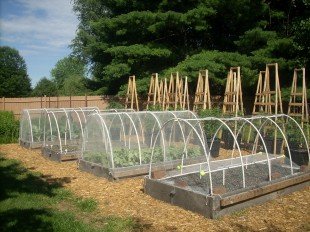
To keep out rabbits and squirrels, we made covers for the beds using 1-inch diameter PVC tubing, 8 feet long. We arched the tubes over the beds, and tied them to a rib along the top using cable ties. (We originally tried drilling small holes through the tubing and screwing the pieces together according to a method we saw on YouTube, but we found that drilling weakened the tubing and the arches would soon crack in half where they were screwed to the top rib. The cable ties solved this problem, and turned out to be much easier.) Next, we put 3 4-inch bolts sticking out of the sides of the beds near the top so we could attach an 8-foot 2-by-4 to each side of the bed. We then laid poultry netting across the bed and ran it under and around the 2-by-4’s. After stapling the netting to the 2-by-4’s, we had a chicken-wire cover for each bed that we could simply slide off of the 3 bolts on the side of the bed and flip up out of the way to work, and then bring back down when we were done working to keep animals out. (During the winter, we tightly screw the 2-by-4’s to the sides of the beds using wing nuts. This keeps the boards from warping in bad weather.) We also covered the ends of the beds with poultry netting. See Pictures Bed Placement, Bed Close Up (note especially the 3 bolts holding the side 2-by-4’s that will hold the poultry netting for the covers), and Back Garden 1.
Since we wanted to gain experience with staple vegetables, we decided on broccoli in bed 1, carrots in bed 2, bush green beans in bed 3, and butternut squash in bed 4.
We also planned to grow 18 tomato plants of mixed variety, 4 containers of zucchini with 3 plants per container, 6 containers with an assortment of sweet and chili peppers, and 8 containers of potatoes.
The next thing to build was a set of sturdy, 8-foot-tall tomato cages. We had seen a good design in a garden magazine, and adapted it to our container set-up by simply raising the rungs to start higher up. The cages are built from standard 1-by-3s. Once in place, we staked them to the ground using standard 1-by-2 stakes we got precut from Black Lumber—again, using cable ties to attach the stakes to the ladders. And just in case you are wondering, yes, our tomato plants grew all the way to the top of our 8-foot cages—and several went well beyond.
Tomatoes are prone to blight, and need to be sprayed for it if they are to make it all the way through to fall. Tomato blight sprays are readily available at our local greenhouses and garden suppliers. Monitor the local Agricultural Extension website to track the progress of tomato blight across the state and begin spraying a week or so before you expect it to arrive. And stay with it—we didn’t do it the first year, and were extremely sorry. We sprayed vigorously the second year, and were richly rewarded. We found that the inexpensive trigger-type sprayers clog up very quickly, but there are several pump-type sprayers available either locally or on the internet that hold up just fine.
We have tried to be as organic as reasonably practical, but do use some fertilizer and organically approved insecticides when necessary. The squash especially can become infested with squash bugs if they go unchecked. This past year we tried a liquid Rotenone-Pyrethrin mix, which works well in our pump sprayer. (The powdered form clogged our sprayers so badly that we gave up on it.) It didn’t eliminate the problems altogether, but seemed to help significantly. So far we have been unwilling to resort to more potent, less organic insecticides.
One particularly effective, and completely organic, way to control insects on plants that do not require insect pollination is to place tulle (bridal veil fabric) over the chicken-wire covers on the raised beds. We tried that on the broccoli, carrots, and bush green beans and it worked pretty well. The cabbage butterflies will find the broccoli and find any opening not perfectly sealed, so eventually some will get in and lay eggs that will lead to caterpillars, which will have to be hunted down in spite of your best efforts. But on the whole, it helped a lot. (See Picture Back Garden 2.)
In picture Back Garden 2 you will notice a low frame inside bed 4 with tennis balls on the ends. This bed held the butternut squash. The idea was to cover the young plants with tulle as long as possible to protect them from the squash vine borers, which lay the eggs of their highly destructive larvae in the spring. These plants require insect pollination, so they can only be protected with covers until they begin to flower, but we were successful in waiting out the laying season for the borers and none of the plants got them. It was then just a matter of controlling the squash bugs later in the season. We were well satisfied with the squash. The 14 plants in that bed yielded 37 delicious squash, which made a beautiful sight as they ripened on the ground in the fall.
We ended our second growing season with 18 tomato plants, which easily produced enough fresh and canned tomatoes for our family of three for an entire year, as well as significant donations to several friends.
The broccoli bed produced 19 good heads from 21 initial plants and a fair amount of secondary growth after the main heads had been collected.
The green bean bed produced 21 pounds of beans.
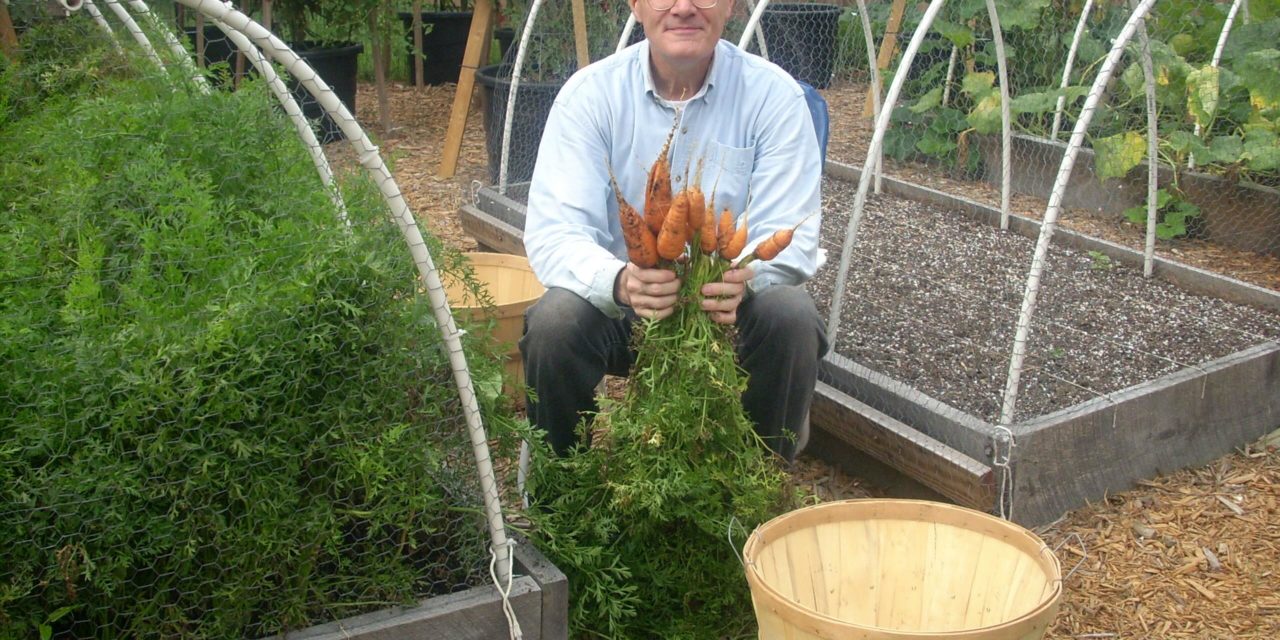
Carrots were less successful—around 12 pounds. Next time we’ll fertilize them more and try some different cultivars.
Zucchini were numberless and absolutely delicious. The hatching of the squash vine borer larvae, which destroyed the plants by August, was the only thing that kept us from drowning in zucchini. Next time we will try two strategies. First, on plants planted in the spring, after removing the tulle when the plants begin to flower, we will try wrapping the bases in aluminum foil to protect the areas where the borers lay their eggs. Second, we will plant a second round after July 1st, after the borers have laid their eggs. We have read that this is a good solution and is especially successful if you are lucky enough have cold weather hold off a bit.
Hope this gives you an idea of what our first venture into vegetable gardening has been like. It has been extremely rewarding for us and we plan to continue with it whenever we spend the summer in Bloomington.


